
Content settings control some of the most important aspects of your app. Each setting is described below:

Basics
Setting
- Enable Favorites? – Allow attendees to "star" sessions, and then filter to show only their selected favorites.
- Show Favorites in My Agenda? - This allows sessions that an attendee has favorited to show on My Agenda so attendees are able to see conflicts.
- Enable Enrollments? – Allow attendees to enroll in a session, which saves a seat. Note that when integrated to an EMS, we send the enrollments back to the core system.
- Session Label 1 – The small text above the session name, which can be colored, and is based on content attributes – 1 of 3.
👉 This is where you choose which content attribute appears as the "session pill" on the session card. - Session Label 2 – The small text above the session name, which can be colored, and is based on content attributes – 2 of 3.
- Session Label 3 – The small text above the session name, which can be colored, and is based on content attributes – 3 of 3. Note that if using all 3, these labels can be cut off.
- Enable Calendar Sync - This allows the Calendar Sync feature to be available in the More screen.
- Calendar Begins – This controls the first day shown on Library. Be sure to make the start time early in the day.
- Calendar Ends – This controls the last day shown on Library. Be sure to make the end time late in the day.
- All Tabs Options – If you want an ALL tab that shows all content, you can either have it be chronological, alphabetical, shown after the last day, or disabled.
- Default Survey Template – You can save time by enabling a default survey template for all sessions.
Note that if you want to have a different survey for some sessions, you can simply go to session > notifications and replace the default survey template with another. - Hours Separators – By default, the Library groups sessions under an hour header. For events with little content this may not be necessary, so you can disable that here.
- Session Status – We include session status for the attendee by default above the enrollment button. We have text like “Seats available” or “Session is full.” You can disable this if desired.
- Enable Recommendations - TBD
- Enable Meetings - Allows Networking meetings to be turned on or off depending on the event.
- Duration Format - You can select the duration format for sessions that best fits your event from the below options.
1. Start time - Duration
2. Start time - End time - Default Agenda Style - Customize your My Agenda view by selecting the default style for your event - Calendar or List view.
- Session Enroll Cutoff (minutes) – At many events, the scanners that control room access need to get their final update N minutes before the session begins. We use this setting to cut off enrollment before the session so that an attendee does not enroll in something that won’t be reflected in the room scanners.
Attributes
Session attributes are important for attendees because they create filters that allow attendees to refine the list of content to more accurately reflect their interests. There are two ways to create content attributes:
1 - When integrated, these come over from the core EMS. You should set up your attributes there.
2 - When not integrated, set them manually. To set the attributes manually, click New Attribute Group, then go through the settings:

Setting - New Attribute Group
- Name - Give the attribute a name. Note that this will be visible in Filters.
- Parent Group - You can have parent-child attribute groups if you like. If so, create the Parent Attribute first and then select the parent group here.
- Show in Filters - Choose whether you want this to show in filters or not (usually yes).
- Is Public - Choose whether it should show on the session detail screen or not (usually yes).
- Color - Choose a color, to be used in Session Labels as shown below on the Library screen.
- Icon - Coming Soon!

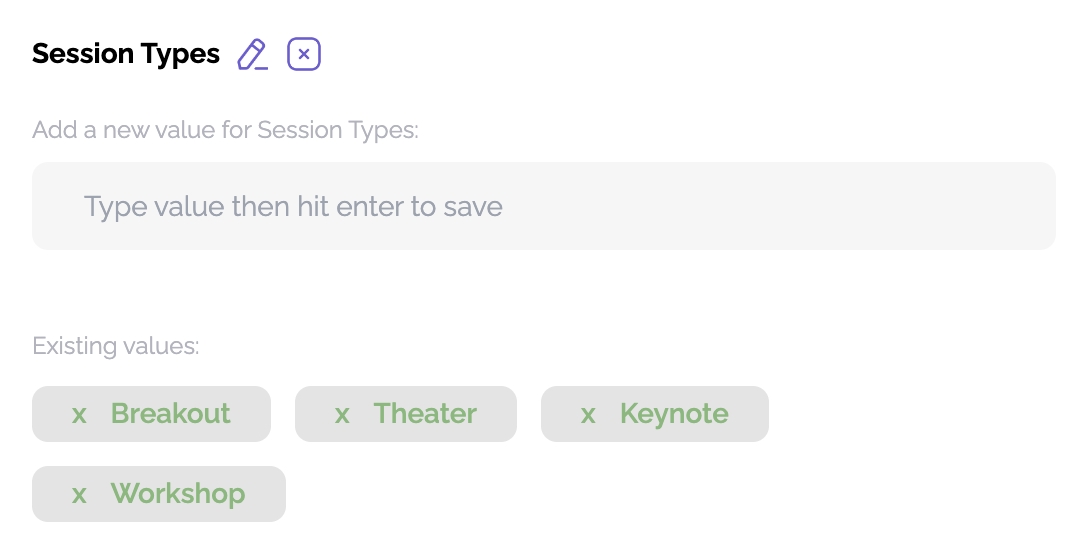
Once created, you simply add the values for the attribute and hit enter after each value, then save at the bottom of the form:
Note that you can set the order in which these appear in the library by clicking Toggle to Order Attributes.

Images
You can save time by setting default images for sessions. Any of these can be replaced for a single session if needed.
- Default Session Landscape Cover Image (1280x720 PNG or JPG or WEBP): the image used at the top of a session detail
- Default Session Featured Background Image (878x220 PNG or JPG or WEBP): when a session is featured, it will use this bg image
- Default Speaker Profile Picture Image (512x512 PNG or JPG or WEBP): when a speaker has no photo, it will use this image